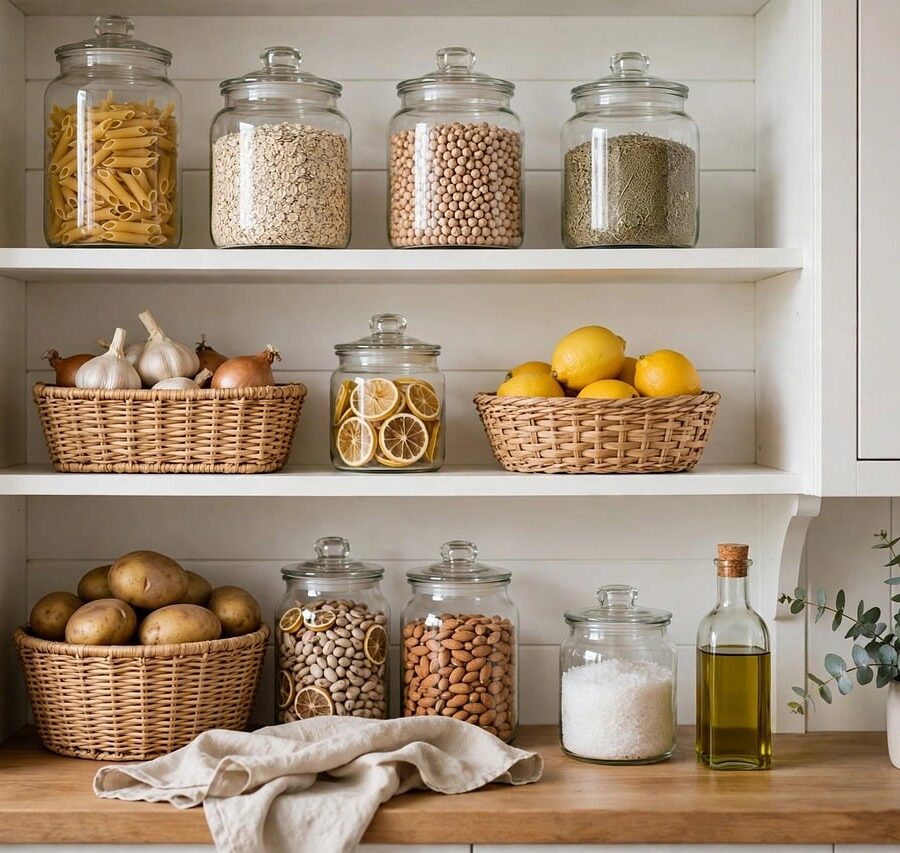
A small pantry fills up fast. Cans hide in the back, bags of rice tip over, and you buy another jar of cumin because you cannot see the ones you already have. Most small pantry organization ideas fall short because they are sized for a walk-in closet, not one cabinet or a narrow shelf unit.
Below are nine ideas built for tight spaces, and none of them need drilling. You will get what to measure, what type of product to look for, and how to set each one up in an afternoon.
Sort everything into zones before you buy bins
Before you buy anything, take everything out and group it by how you use it. Common zones are breakfast, baking, pasta and grains, canned goods, snacks, and oils and sauces.
Zones work in a small space because you stop hunting. When all the baking supplies live together, you grab one group instead of digging through three shelves.
Toss anything expired and move rarely used items, like a big roasting pan or party platters, out of the pantry. Then put the zones you use every day between about eye and waist level.
Measure shelf depth, height, and door clearance first
Most pantry buying mistakes come down to size. A container that is too deep blocks the door, and one that is too tall will not fit under the next shelf.
Measure the width, depth, and open height of each shelf and save the numbers on your phone. Shelf depth varies a lot from one cabinet to the next, so do not rely on a standard size. If you plan to use the door, measure the gap between the door and the front of the shelves too.
Buy one of each item first and test the fit. Once it works, buy more.
Decant dry goods into clear, square containers
Pour flour, rice, pasta, oats, and cereal into clear containers with airtight lids. Square or rectangular shapes waste less room than round ones and stack more neatly.
Clear sides show how much is left, so you stop buying duplicates. Containers also stand up straight, while open bags slump and tip over.
Wash and fully dry each container, fill it, and label it with the food name. Finish a partly used bag before refilling a container so old and new flour or rice do not mix. Start with the items you use most, since that is where the payoff is biggest. Rarely used items can stay in their original packaging.
snug tip
Cut the cooking directions and best-by date from the bag and tape them to the container, or snap a photo of them. That way you still have them when the package is gone.
Add a freestanding shelf riser to see the back row
A tiered riser is a small step-style shelf that sits on top of an existing shelf. It lifts the back row so you can read every label. It works well for cans, jars, and spice bottles.
A riser turns one layer into two or three without any tools or holes, so it uses the vertical space that most shelves waste.
Measure the open height between shelves. The riser plus your tallest item should fit with enough room to slide things in and out. Adjustable risers that expand in width are handy if your shelf is an odd size.
Use a turntable for corners and deep shelves
A low turntable lets you spin items forward instead of reaching into the dark. It is a good fit for oils, vinegars, sauces, honey, and jars.
Pick one with a raised lip so bottles do not slide off. Choose a size that is an inch or two smaller than your shelf depth so it can spin freely without hitting the wall or the door.
Group similar items on each one, such as all the cooking oils on one and all the sauces on another. You will find things faster and spot what is running low.
Hang an over-the-door rack for light items
An over-the-door rack hooks over the top edge of the door and hangs down the back. It is a quick way to store spice packets, seasoning mixes, foil, plastic wrap, and snack bags.
It uses space that is otherwise empty, so your shelves stay open for bigger items.
Check how thick your door is so the hooks fit, and make sure the rack leaves enough room for the door to close. Hang it empty first, close the door to test, then load it. Keep heavy cans on the shelves.
Renter note: Over-the-door racks need no drilling, but check the weight limit on the label and make sure the door closes without scraping the paint or frame. Use one on a solid pantry door; a thin cabinet door on small hinges may not handle the weight.
snug tip
Spices keep their flavor longer away from heat and light, so skip the door rack for them if your pantry backs onto the stove or oven.
Use tension rods as dividers for trays and lids
A spring-loaded tension rod wedged upright between two shelves makes a slot that keeps baking sheets, cutting boards, and pot lids on edge instead of stacked in a messy pile. Two rods a few inches apart hold items better than one.
Measure the gap between the shelf and the one above it. Pick a rod whose range covers that number, twist it until it is snug, and give it a gentle tug to check it holds. Do not over-tighten.
Tension rods only hold light loads, so use them for flat, light items. Put heavier cookware somewhere else.
Renter note: Tension rods leave no holes, but too much pressure can dent soft shelf surfaces or lift a shelf off its pegs. Choose rods with rubber tips, tighten only until firm, check the weight limit on the package, and keep them to light items like trays and lids.
Turn clear bins with handles into pull-out drawers
Clear stackable bins with handles act like drawers on a deep shelf. Make one for snacks, one for breakfast foods, one for baking supplies, and one for packets and mixes.
You pull the whole bin to the front of the shelf, so the back is no longer wasted. Everything in a group travels together, which makes it easy to carry to the counter.
Measure the shelf depth and choose bins a little shorter than that, so the door can still close. Label the front of each bin. Stack them only if the lids or tops sit flat and steady.
Give pet food and bulk backstock a lidded floor bin
If you have a dog or cat, the food bag can take up a whole shelf. A lidded bin on the pantry floor holds it and keeps the scoop close. Leave the food in its original bag inside the bin so you keep the best-by date and lot number.
Choose a bin with a latching lid so curious pets cannot get in. Keep pet food and treats apart from your own food, and store anything unsafe for pets, such as chocolate, raisins, and onions, up high.
Use a second bin on the floor for bulk items, such as extra rice or paper goods. Label it so you remember what is inside, and measure the height with the lid on before you buy.
Where to start
This weekend, empty one shelf at a time, or the whole pantry if it is small enough. Toss expired food, group what is left into zones, and write down your shelf measurements.
Then pick one or two pieces to buy first, like clear bins with handles and a shelf riser. Live with the setup for a week, see what still bugs you, and add a turntable, tension rods, or a door rack later.
Quick answers
How do I organize a small pantry with no shelves?
Use stackable clear bins on the floor and a slim freestanding shelf unit if there is room. Group foods into zones and label the front of each bin so you can find things fast. If the pantry has a solid door, an over-the-door rack can handle light items like spice packets.
What is the best way to organize a deep pantry shelf?
Use bins with handles so you can pull items forward like a drawer. A turntable also helps for jars and bottles at the back. Measure the shelf depth first so the door can still close.
Do I have to put everything in containers?
No. Containers help most with foods you use often and open bags that tip over, like flour, rice, and cereal. Cans, boxes, and sealed items can stay in their original packaging in a bin or on a riser.
free for subscribers
Pantry labels that make it stick
Print, cut, stick. Plus one small-space fix in your inbox every week. Unsubscribe anytime.